
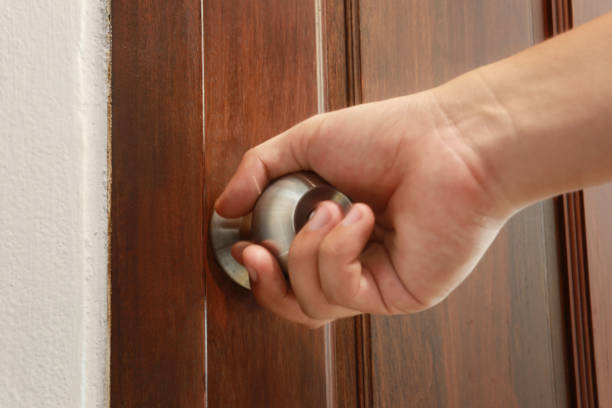
Let’s face it—door knobs can wear out over time. Maybe your old knob is loose, the latch mechanism sticks, or the style just doesn’t fit your home anymore. Whatever the reason, it’s time for a change.
Replacing door knobs isn’t just about improving function, it’s an easy way to upgrade the look of your door hardware and give your house a fresh touch. The best part? You don’t need to be a DIY expert to do it.
This guide will take you through everything step-by-step, from removing the old knob to installing the new doorknob. Whether it’s for your front door, a bedroom, or even an old house, you’ll have it sorted in no time.
Let’s get started!
Understanding Door Knob Types
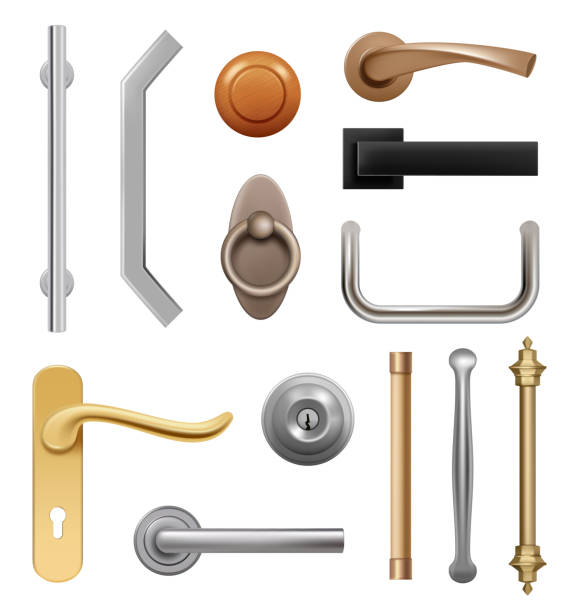
Before replacing door knobs, it’s essential to know what kind of knob you’re dealing with. Different doors require different types of hardware, so picking the right one ensures both functionality and style.
Here are the most common types of door knobs:
- Entrance Knobs: These come with a locking mechanism and a key, making them perfect for front doors or exterior doors where security is a priority.
- Privacy Knobs: Ideal for bedrooms or bathrooms, these knobs have a lock but don’t require a key. They’re great for spaces that need privacy but not heavy-duty security.
- Passage Knobs: These don’t have a lock or latch mechanism. They’re commonly used for areas like hallways or closets where locking isn’t necessary.
- Dummy Knobs: These are purely decorative and don’t turn or latch. You’ll often find them on pantry doors or other spots that don’t require a functional knob.
Understanding these types makes it easier to choose the right new knob for your needs. Whether it’s a doorknob for an interior room or a secure door lock for your entryway, matching the hardware to the job is key.
Tools and Materials Checklist
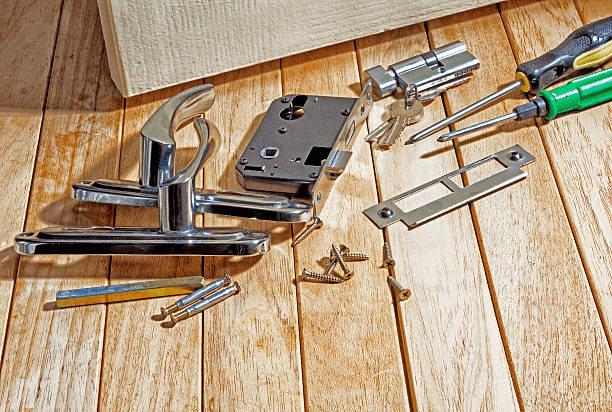
Before you start replacing door knobs, make sure you have everything you need. Having the right tools and materials on hand will save you time and frustration.
Here’s what you’ll need:
- New doorknob: Choose a style that matches your room and door hardware.
- Phillips head screwdriver: Most screws on door knobs require this type.
- Flat-head screwdriver: Handy for prying off the old latch plate, if necessary.
- Tape measure: Use it to check the backset and ensure the new latch fits properly.
- Chisel and hammer: Only needed if the new latch doesn’t match the size of the hole in the door.
Having these tools nearby makes the door knob installation process smooth and frustration-free.
Step-by-Step Guide to Replacing Door Knobs
Replacing door knobs might sound tricky, but it’s surprisingly simple. Follow these steps to get it done like a pro.
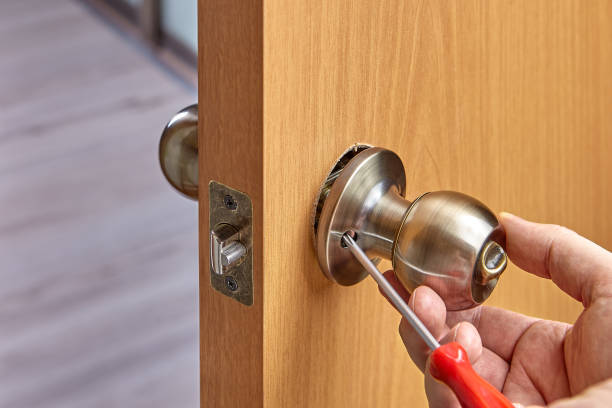
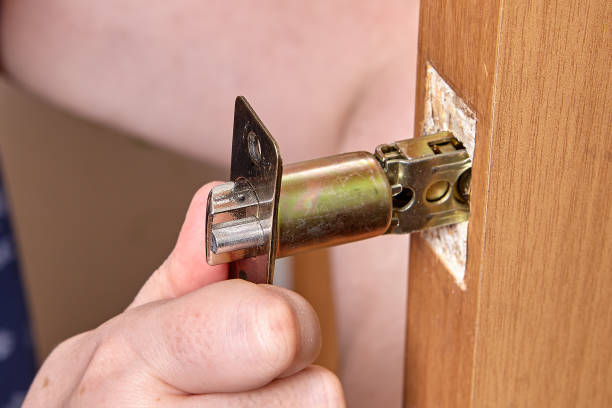
Step 1: Remove the Old Knob
- Locate the two screws on the side of the door holding the interior knob in place. Use a Phillips head screwdriver to unscrew them.
- Gently pull the interior knob and the other knob apart, removing them from both sides of the door.
- Next, remove the old latch mechanism by unscrewing the latch plate on the edge of the door. Slide the latch out.
Tip: Keep the screws and old hardware in a small container in case you need them later.
Step 2: Prepare the Door for the New Latch
- Inspect the hole in the door and the space on the edge of the door where the new latch mechanism will go.
- If the new latch doesn’t fit, use a chisel to adjust the size of the hole or the space for the latch plate.
- Ensure the screw holes from the old hardware align with the new latch.
Tip: A clean and properly aligned latch area makes installation easier.
Step 3: Install the New Latch
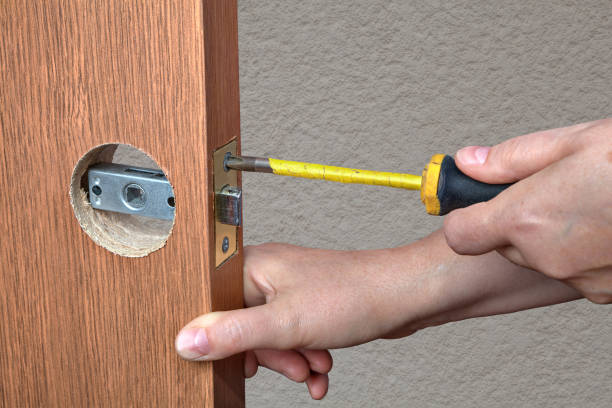
- Insert the new latch into the hole in the door. Make sure the beveled edge of the latch faces the door jamb, so it catches the new strike plate when the door closes.
- Align the latch plate with the edge of the door and secure it with two screws.
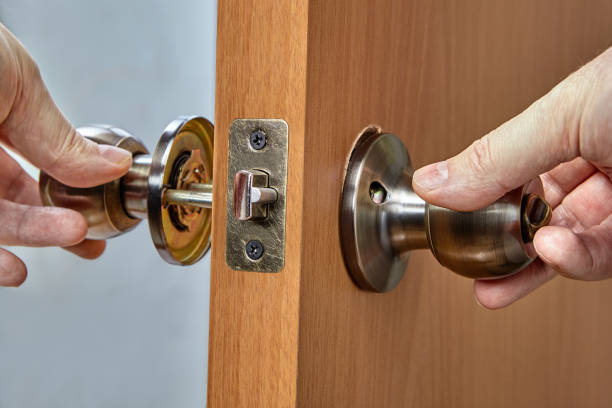
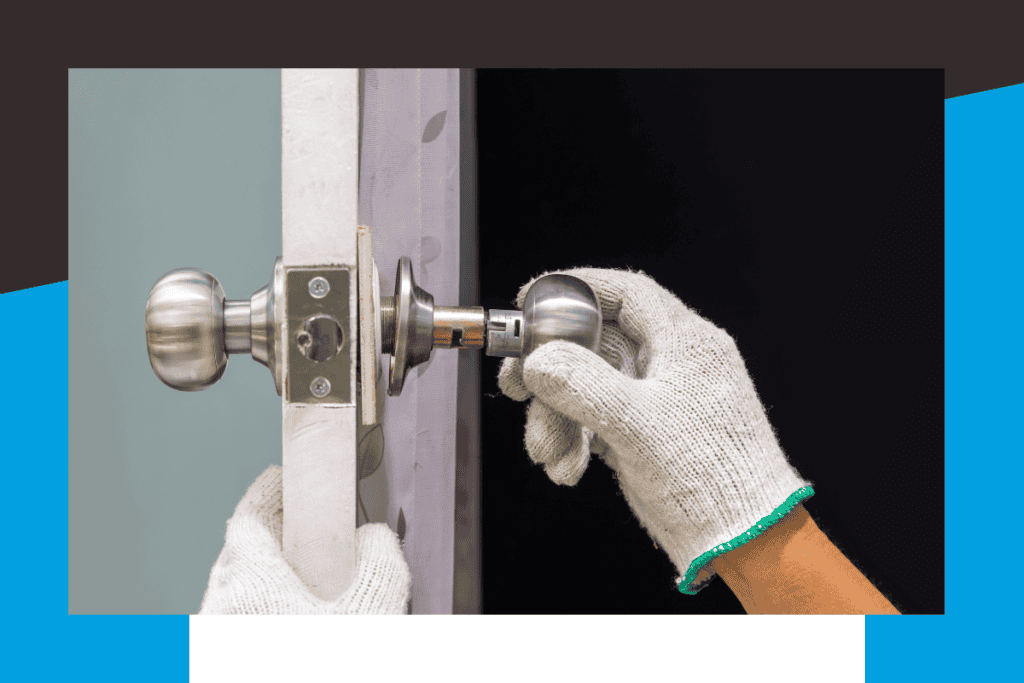
Step 4: Attach the New Knobs
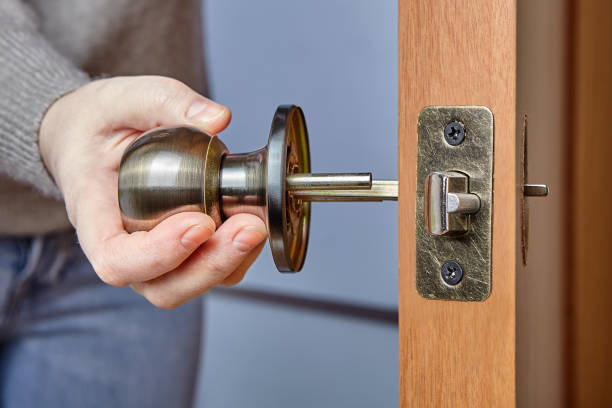
- Position the exterior knob on one side of the door, inserting its spindle through the latch mechanism.
- Place the interior knob on the other side of the door, aligning it with the spindle.
- Tighten the screws to secure both knobs in place. Make sure the knobs turn smoothly and operate the latch.
Step 5: Install the New Strike Plate
- Remove the old strike plate from the door frame.
- Align the new strike plate with the latch and secure it with screws. If needed, adjust the position slightly to ensure a snug fit.
Step 6: Final Check and Testing: Verify Proper Installation
- Test functionality: Turn the knob, operate the lock, and close the door to ensure everything works smoothly.
- Check alignment: Make sure the latch aligns with the strike plate.
- Ensure security: If it’s a locking knob, test the lock for secure operation.
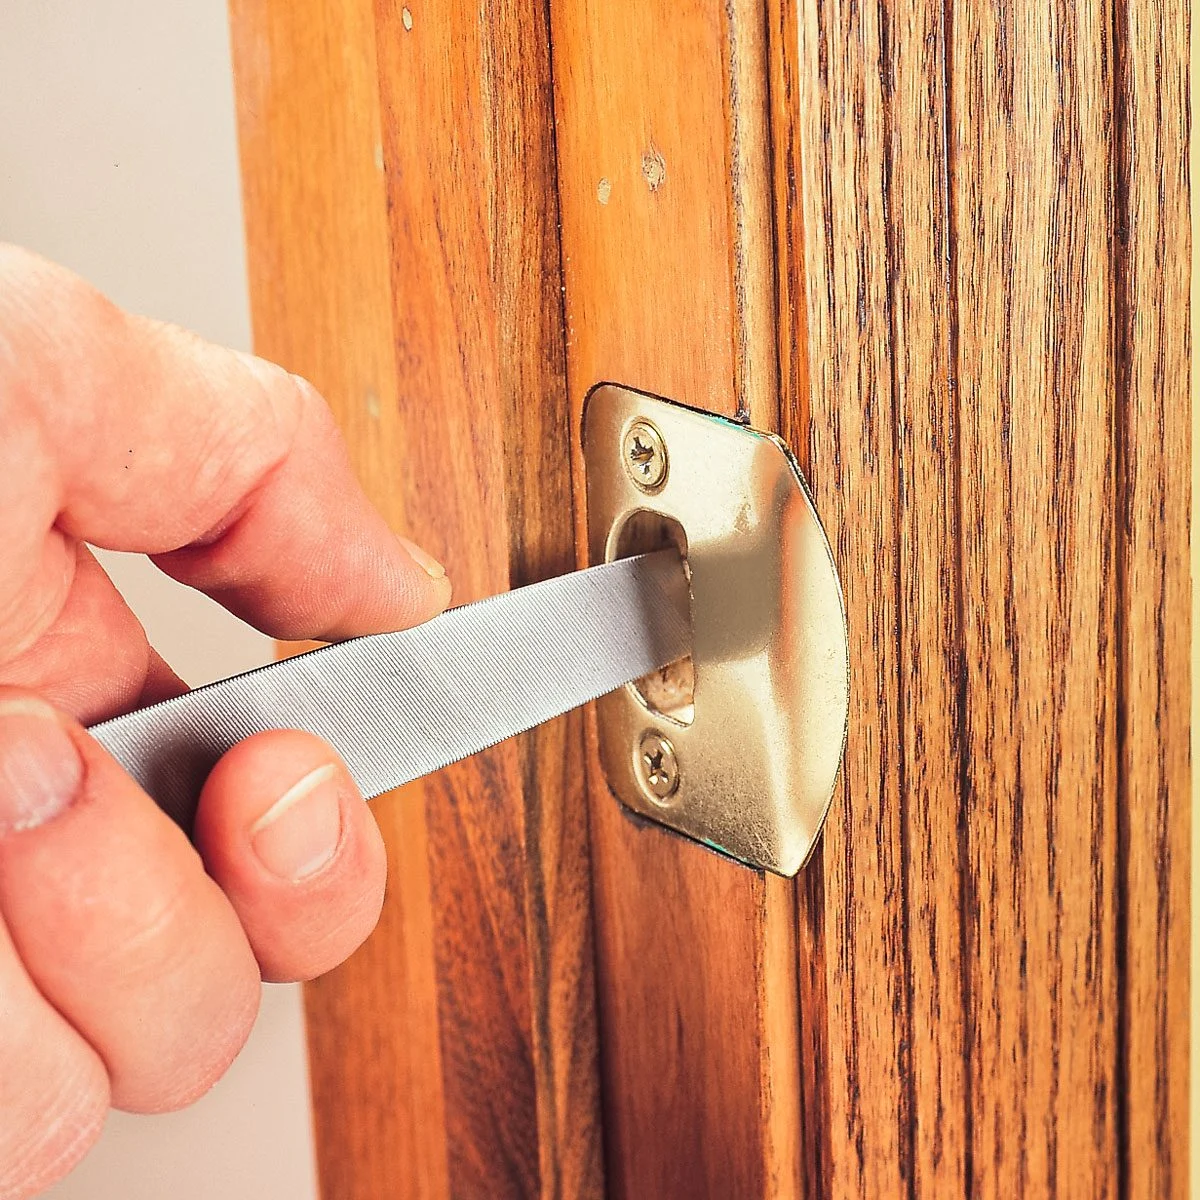
Tip: If the latch doesn’t align with the strike plate, adjust the position slightly or file down the edges of the plate.
Common Issues and Troubleshooting
Even with the best preparation, you might run into a few hiccups while replacing door knobs. Don’t worry! Here are some common problems and quick fixes to keep your project on track.
1. Loose Door Knob
If the new doorknob feels wobbly, check the two screws holding it in place. Tighten them with a Phillips head screwdriver, but don’t over tighten—it could strip the threads.
If the knob still feels loose, ensure the screw holes are properly aligned. For older doors, worn holes may need reinforcement with wood filler or slightly longer screws.
2. Latch Doesn’t Retract Properly
When the latch mechanism doesn’t move smoothly, it’s often due to misalignment. Check if the new latch is positioned correctly and the strike plate on the door frame matches the latch’s path.
If needed, adjust the position of the strike plate or file its edges to ensure a perfect fit.
3. Knob Feels Stiff
A stiff knob can result from overtightened screws or poor alignment. Loosen the screws slightly and test again.
If the problem persists, inspect the latch mechanism and lubricate it with a silicone-based spray. Avoid using oil-based lubricants—they attract dirt and can clog the mechanism over time.
4. Door Doesn’t Close Properly
If the door doesn’t latch, the new strike plate might not be properly aligned. Open the door and check if the latch aligns with the opening in the strike plate.
If not, adjust the position of the strike plate slightly or file the opening to make it larger.
5. Misaligned Latch Plate
Sometimes, the latch plate on the edge of the door isn’t flush. Use a chisel to make minor adjustments, ensuring the plate sits evenly. This helps the latch move smoothly and improves overall performance.
Pro Tip: Test Before Tightening Before fully securing the new door knob, test the knob, latch, and lock to ensure everything works. Small adjustments are easier to make before everything is locked into place.
Keep It Running Smoothly
- Lubricate the latch mechanism periodically.
- Clean the knob with a soft cloth to maintain its finish.
With these tips, you can tackle almost any issue and ensure your new door knob works perfectly.
Conclusion and Call-to-Action
Congratulations! You’ve just learned how to tackle one of the easiest and most satisfying home improvement projects: replacing door knobs.
Whether you’ve installed a new doorknob on a bedroom door, upgraded the lock on your front door, or swapped out an old knob for something more modern, you’ve taken a step toward improving your home’s style and functionality.
Now it’s your turn!
- Share Your Success: Did you try this guide? Show off your results or share tips in the comments below!
- Explore More DIY Projects: Ready to keep the momentum going? Check out our other home improvement guides, like upgrading locks or painting doors for a complete transformation.
- Ask for Help: Got questions? Drop them below—we’d love to help you out!
Replacing a door knob isn’t just about improving your door hardware; it’s about feeling empowered to tackle more projects around your house.
FAQ Section
This section answers common queries, improving the user experience and addressing potential search queries.
Q: How long does it take to replace a door knob?
A: Replacing a door knob typically takes 15–30 minutes, depending on your experience and whether adjustments are needed for the latch or strike plate.
Q: Do I need special tools to replace a door knob?
A: No special tools are required. Most replacements only need a Phillips screwdriver. If you need to modify the latch hole, a chisel and hammer might be helpful.
Q: Can I replace a door knob without removing the door?
A: Absolutely! The entire process can be done with the door in place.
Q: What should I do if the new latch doesn’t fit the existing hole?
A: You may need to widen or adjust the hole using a chisel and hammer to ensure a proper fit.


