DIY interior door installation can seem a little intimidating at first, but trust me—it’s way easier than it looks. In fact, if you’re using a pre-hung door (which is a door that already comes with its own frame), it’s a lot more straightforward than starting from scratch. No special tools needed, just the basics. I’ll walk you through every step to make sure you’re set up for success.
Maybe you’re replacing an old door that’s a little worse for wear, or maybe you just want a fresh look to upgrade your space. Whatever the reason, this project is 100% doable on your own. With a little patience and the right guidance, you’ll have that door up in no time. Let’s get started!
Prehung Door vs. Slab Door: Which One Do You Need?
When it comes to replacing interior doors, you’ll typically have two options: a prehung door or a slab door. Understanding the difference will help you decide which is best for your specific project.
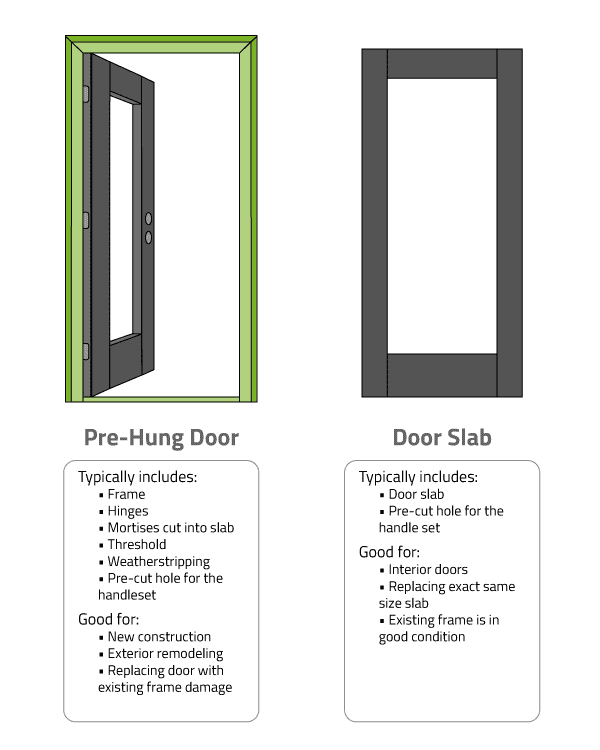
What is a Prehung Door?
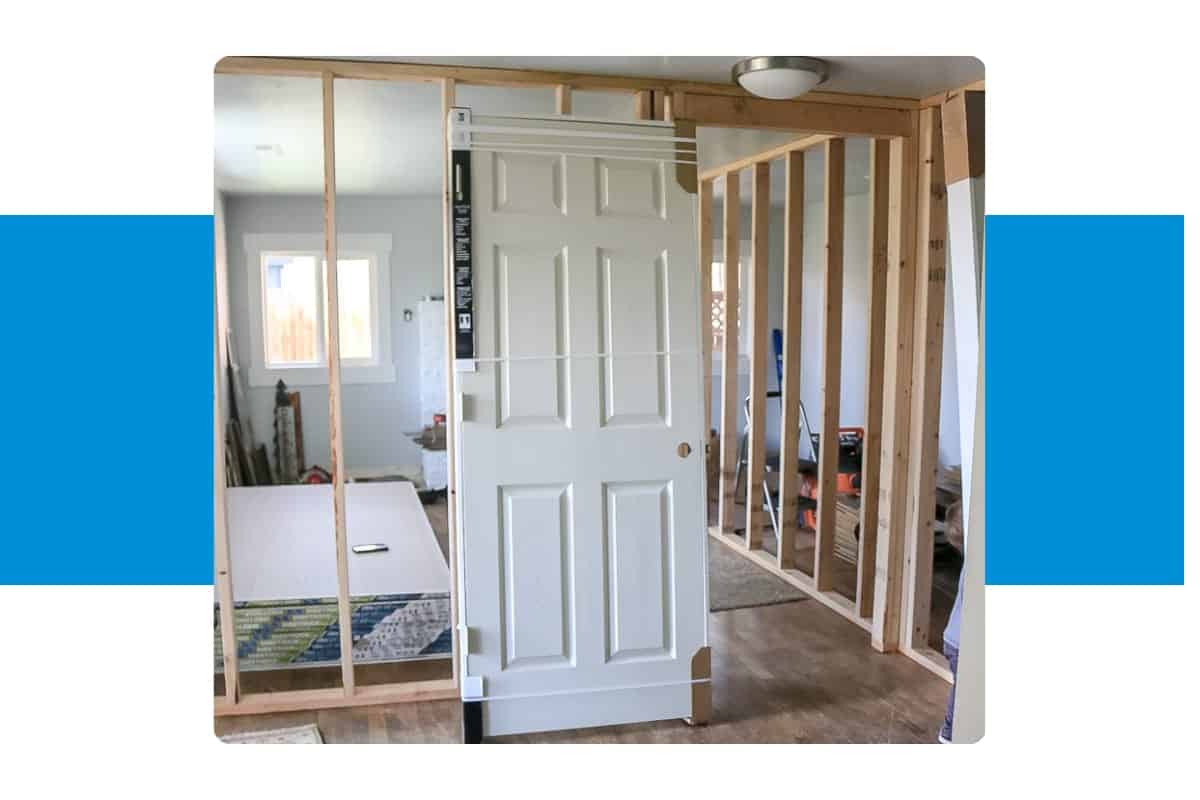
A prehung door is a complete unit, which includes the door slab, door frame, and hinges already installed. This means the door is ready to be hung in your rough opening—all you need to do is fit the entire assembly into the opening and secure it.
- Advantages: This is the easiest option if your door frame is damaged or you want a fresh start. The door jamb and hinges are already preinstalled, making it a great choice for new construction or when replacing a door in a severely damaged frame.
- When to Choose: If the door frame is warped, cracked, or too damaged to repair, replacing it with a prehung door is the best choice. It saves you the time and effort of installing a new frame separately.
What is a Slab Door?
A slab door is just the door slab itself—the door without the frame or hinges. If your existing door frame is in good condition and you just want to swap out the old door for a new one, a slab door can be the more affordable and less labor-intensive choice.
- Advantages: If your door frame is in good condition, replacing just the door (with a slab door) can be faster and more cost-effective. It allows you to keep the existing jamb while giving your space a fresh look with a new door.
- When to Choose: Opt for a slab door if your current door frame is in good condition and you just want to replace the door slab itself. This is ideal when you’re upgrading the look of your door without needing a full frame replacement.
For this project, we’re focusing on replacing a door in the existing jamb, using a slab door. However, if your door frame needs replacement, you’ll want to go with a prehung door.
What You’ll Need for DIY Interior Door Installation: Tools & Materials
Before you start installing your new interior door, let’s make sure you’ve got the essentials. Thankfully, you won’t need any fancy tools, just some basics:
Tools:
- Tape measure – To get those measurements just right.
- Level – Keeps everything straight, so the door doesn’t swing open on its own.
- Hammer – For light nailing.
- Screwdriver – Essential for tightening up those hinges.
- Drill (optional) – Speeds up the process if you’re comfortable using one.
- Utility knife – Handy for cutting shims or trimming small edges.
- Shims – These small wedges help align your door perfectly.
- Circular saw (optional) – In case the door needs a bit of trimming to fit.
Materials:
- Prehung door – It already comes with its own frame (also called a door jamb), so no need to build from scratch.
- Finishing nails – For attaching trim or the door stop.
- Wood filler – For filling any nail holes once everything is in place.
- Paint or stain (optional) – Only if you want to match the door to the rest of your space.
Step 1: Prepping the Space
Alright, tools are ready, and now it’s time to get your workspace set up for the new interior door installation. This is a key part, so don’t rush it. A little prep goes a long way to make sure everything fits smoothly!
Remove the Old Door (if you’re replacing one)
- First, close the old door and find the hinge pins. Use a hammer and a nail to gently tap them out, starting from the bottom hinge.
- Once the hinge pins are out, lift the door off. (Pro tip: Get a friend to help you here if it’s a heavy door!)
Check the Rough Opening
- With the door out of the way, take a look at your opening. This is the space where your new door frame will sit.
- Make sure the opening is square and plumb (a fancy way of saying “perfectly straight”).
- Use a level to check the sides and top, and a tape measure to confirm it’s the right size for your new door.
Clear Out Any Obstructions
- If there are any stray screws or nails in the frame or drywall, remove them now.
- You can also use a utility knife to trim any bits of drywall or paint that might get in the way of a snug fit.
Now, your workspace is all set! With a clean and level opening, you’re ready to start placing your new prehung door.
Step 2: Positioning the New Door
Time to bring in the new prehung door! Take it slow, and don’t worry—this part is easier than it seems.
Place the Door in the Rough Opening
- Carefully lift the prehung door and slide it into the rough opening.
- Make sure the door jamb (that’s the frame around the door) sits snugly against the wall.
Check the Door’s Alignment
- Close the door to see how it sits in the frame. You want an even gap between the door and the frame along the hinge side, latch side, and at the top.
- Use your level to make sure everything is straight and plumb. If one side is a little off, don’t worry—shims are here to help.
Insert Shims to Adjust Fit
- Starting on the hinge side, place shims between the door frame and wall studs. These will keep the frame steady and help adjust the fit.
- Check the alignment after each shim, adjusting as needed to keep everything straight. (You want that door to swing perfectly, after all!)
- Once the door is aligned, you can move on to securing it in place.
Step 3: Securing the Door Frame
Now that your door is positioned just right and the shims are in place, it’s time to lock it down. Securing the door frame ensures that it’s stable, and it’ll keep your door functioning smoothly over time.
Attach the Frame to the Wall
- Start with the hinge side. Use finishing nails or screws to attach the frame to the wall studs through the shims.
- Place nails or screws above and below each hinge. Double-check your alignment after each attachment to make sure the frame stays plumb.
Secure the Latch Side
- Move to the latch side of the frame and repeat the process. Add shims as needed to keep the gap between the door jamb and the door even along the entire side.
- Nail or screw through the door jamb into the wall studs, keeping everything tight and aligned.
Trim the Shims
- Use a utility knife to trim any excess shim material sticking out from the frame.
- A clean, flush fit is key here—it’ll make your job look polished once we add the trim later.
Final Check
- Open and close the door a few times to make sure it swings easily, without sticking or rubbing against the frame.
- If the door swings perfectly, then you’re good to go!
With the frame now secured, your door is stable and ready for the finishing touches.
Step 4: Adding the Trim
Alright, with the door frame secured and the door swinging smoothly, it’s time to add the finishing touch: the trim. This part makes everything look polished and covers any gaps between the door jamb and the wall.
Measure and Cut the Trim
- Measure the height and width of your doorway to get the right length for each piece of trim.
- Cut each piece to fit, using a circular saw if you need to trim them down. Remember: you want a snug fit along each side.
Attach the Trim to the Wall
- Place the trim pieces around the door frame, starting with the top piece, followed by the sides.
- Use finishing nails in attaching the trim to the wall. Place nails every few inches along each side for a secure fit.
- Be careful not to nail too close to the edge, as this can split the wood.
Fill and Smooth Nail Holes
- After securing the trim, use wood filler to cover any nail hole. This gives the trim a clean, seamless look.
- Once the filler is dry, lightly sand it down until it’s smooth to the touch.
Optional: Caulk and Paint
- If you want an even cleaner finish, run a thin line of caulk along the edge where the trim meets the wall.
- Finally, paint or stain the trim if needed to match your room’s style. Now your door looks like it was always meant to be there!
With the trim installed, you’re almost done!
Step 5: Installing the Hardware
You’re in the home stretch! With the door in place and the trim installed, the last step is to add the hardware. This includes the hinges, doorknob, and strike plate to ensure your door functions like a charm.
Attach the Hinges
- If the hinges aren’t already attached, align them with the hinge mortises on the door jamb and the door itself.
- Use a screwdriver or drill to drive screws into the screw holes. Make sure the hinges are flush against the door and frame for smooth operation.
Install the Latch and Strike Plate
- Mark where the latch will sit on the latch side of the door. Drill any necessary holes if they’re not pre-drilled.
- Insert the latch into the hole on the door edge and secure it with screws.
- Next, attach the strike plate to the door jamb at the corresponding spot. It should align with the strike plate when the door is closed.
Add the Doorknob or Handle
- Insert the doorknob or handle through the holes on both sides of the door, making sure the parts line up.
- Secure the doorknob with screws, tightening them enough so that it feels stable but not overly tight.
Final Adjustments
- Close the door to make sure the latch and strike plate align perfectly.
- If needed, adjust the strike plate or latch side slightly to ensure a smooth and secure closure.
Now your door is not only looking great but also working perfectly. Let’s do one final check to make sure everything’s in top shape.
Step 6: Final Checks and Touch-Ups
Congrats! You’re almost there. Now let’s check again everything and do a few finishing touches to make sure your new door is absolutely perfect.
Test the Door
- Open and close the door a few times to ensure it swings smoothly without sticking.
- Check that the door closes securely and that the latch aligns perfectly with the strike plate.
Inspect for Gaps or Adjustments
- Look around the edges of the door. The gap between the door and the frame should be even on all sides.
- If there are any uneven gaps, you can fix the shims slightly to improve alignment.
Fill Any Remaining Nail Holes
- Go over the trim and door frame one last time to check for visible nail hole. If you spot any, use a bit of wood filler to cover them.
- Once the filler is dry, lightly sand it for a smooth finish.
Final Touch: Paint or Caulk (Optional)
- For a polished look, you can apply a line of caulk around the edges of the trim where it meets the wall.
- If you want, give the door or trim a fresh coat of paint to match the room’s style. This step is optional but gives a professional finish.
- Install door stops to prevent the door from damaging the wall or trim. Choose between floor or frame-mounted stops.
And that’s it! Step back and admire your work. You’ve successfully installed a new interior door from start to finish. It looks fantastic, and even better—you did it yourself!
Maintenance Tips for Long-Lasting Doors
- Inspect the Door and Frame
Check for wear, cracks, or damage to the door and frame. Look for rust on the hinges or strike plate. - Lubricate Hinges and Latch
Apply lubricant to hinges and latch to keep them working smoothly and quiet. - Check the Door’s Alignment
If the door sticks, check the hinges and strike plate alignment with a level. Adjusting the shims or screws if needed. - Keep the Door and Frame Clean and Dry
Wipe the door and frame with mild soap and water to remove dirt. Avoid harsh chemicals that can damage the finish.
Addressing Common Installation Issues
Even with careful preparation and installation, sometimes things don’t go as planned. Don’t worry though; these common issues can be easily fixed with a little adjustment.
- Not Measuring the Rough Opening Accurately
Mistake: A rough opening that’s too small or too large can cause the door frame to fit incorrectly.
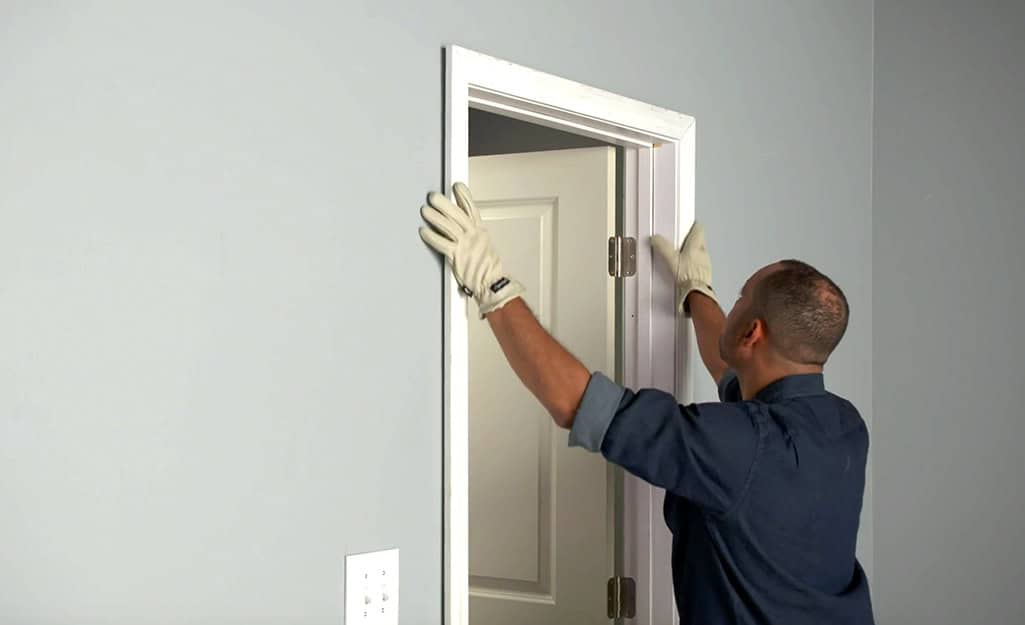
Solution: Measure the it carefully and ensure it’s 2 to 2.5 inches larger than the door frame on all sides. Double triple-check before purchasing your door. - Ignoring the Floor Level
Mistake: If the floor isn’t level, the door frame may not sit properly, affecting how the door swings.
Solution: Always check that the flooring is level before starting. If necessary, shim the door frame or make adjustments to accommodate any unevenness. - Using Incorrect Tools and Materials
Mistake: Using the wrong size screws, nails, or tools can lead to a poorly aligned door frame.
Solution: Ensure you have the correct tools and materials for the job, like the right-size screws for the hinges and door frame. Always use shims to adjust the fit. - Skipping Final Adjustments
Mistake: Sometimes, after securing the door frame, DIYers forget to check the door’s operation.
Solution: After securing everything, test the door’s swing, latch alignment, and look for any gap or binding. Make adjustments as needed. - Dealing with Out-of-Plumb Walls
Problem: If the walls are out of plumb, the door frame might not align properly, causing the door to swing awkwardly.
Solution: Use a level to check the plumb of the walls. Adjust the frame with shims between the frame and wall studs to keep everything aligned. - Fixing Out-of-Plumb or Non-Parallel Trimmers
Problem: If the trimmers (the studs framing the opening) are not level or parallel, the door frame will sit unevenly.
Solution: Use shims to fill any gaps between the frame and trimmers. If the issue is severe, you may need to trim or adjust the frame to fit. - Correcting Out-of-Square Trimmers
Problem: If the trimmers are out of square, the door frame may sit crooked, causing the door to stick.
Solution: Add a third shim to the standard pair to square up the frame and align the door properly. - Fixing Door Binding Problems
Problem: If the door binds (sticks when opening or closing), it’s likely due to hinge misalignment or issues with the strike plate.
Solution: Check the alignment of the hinges and adjust the shims around the hinge side. Ensure the strike plate is properly positioned on the latch side of the door.
Final Thoughts
Nice work! By following these steps, you’ve taken on a home improvement project that not only upgrades your space but also gives you some serious DIY cred. Installing interior doors can seem intimidating, but once you break it down, it’s totally manageable. Plus, it’s a great skill to have if you ever want to tackle more projects around the house.
Whether you’re replacing old doors or adding a new ones, you’ve learned the basics of shimming, aligning the door jamb, installing a strike plate, and making sure everything fits perfectly. And every time you walk through that door, you’ll have the satisfaction of knowing you did it yourself.
So congrats on a job well done, and enjoy that new door! Who knows—maybe your next project is just around the corner
