DIY Front Door Installation
Why Consider DIY Front Door Installation?
DIY front door installation can be a rewarding and cost-effective project that adds value and curb appeal to your home. While hiring a professional may seem like the easier option, DIY front door installation allows you to customize the process to your specific needs and preferences. Additionally, it can save you a significant amount of money, as professional installation fees can be quite high. With the right tools, materials, and a step-by-step guide, you can successfully complete your own DIY front door installation and achieve professional-looking results.
Tools and Materials You’ll Need for DIY Front Door Installation
Before you start, it’s crucial to gather all the necessary tools and materials. Having everything on hand will make the process smoother and save you from making multiple trips to the hardware store.
Essential Tools for DIY Front Door Installation
Step 1: Remove the Existing Opening
When performing DYI front door installation, it’s not just about taking the door off its hinges. You may also need to remove the door frame if you’re upgrading to a pre-hung door, which comes with its own frame. This process can sound complicated, but with the right tools and approach, you can handle it smoothly. Follow this step by step process for removing your existing opening.
Remove the Door from the Hinges
- Start with the pins: If the door is still attached, the first step is to remove the door from the hinges. You’ll need a hammer and screwdriver to tap the hinge pins out. Place the tip of the screwdriver at the bottom of the hinge pin and tap upward gently with the hammer until the pin is loose enough to pull out.
- Lift the door off: Once the pins are removed, simply lift the door off the hinges. Be careful—doors can be heavier than they look, so ask for help if needed.
Remove the Trim (Molding)
- Use a utility knife: Cut along the edges where the trim meets the wall to break the paint seal, preventing damage to the surrounding wall.
- Pry off the trim: Using a pry bar or flathead screwdriver, gently pry off the trim around the door. Work carefully to avoid damaging the wall or trim, especially if you want to reuse it.
Remove the Door Jamb (Frame)
- Examine the jamb: The door jamb is the vertical frame that the door hangs on. Use the pry bar to pull it away from the studs in the wall. You may also need to remove any screws or nails that are holding the jamb in place.
- Cut through any caulk or sealant: If there is caulking sealing the door jamb to the wall, use a utility knife to cut through it.
- Pry out the jamb: Once all nails and screws are removed, use the pry bar to carefully pull the jamb away from the rough opening.
Remove the Threshold
- Unscrew or pry out the threshold: The threshold (the piece of wood or metal at the bottom of the door) may be screwed down or attached with nails. Remove these fasteners and carefully pull out the threshold.
Step 2: Measure the Rough Opening
Once the old door and frame are removed, to continue with your DIY front door installation, you’ll need to measure the rough opening to ensure your new door fits perfectly. The rough opening is the space in the wall where the door frame will be installed, and getting the measurements right is critical for a smooth DIY front door installation.
What is the Rough Opening?
The rough opening refers to the structural opening in the wall before the door frame is installed. This includes the width, height, and depth of the space where the door will sit. It’s usually slightly larger than the actual door to allow room for shimming and adjusting the door during your DIY front door installation project.
How to Measure the Rough Opening for Your DIY Front Door Installation
Measure the Width
- Using a tape measure, measure the width of the opening from one stud to the other. Make sure you measure at the top, middle, and bottom of the opening, as the width might not be consistent throughout.
- Write down the smallest width measurement you get.
Measure the Height
- Measure the height from the subfloor (or base of the rough opening) to the top of the frame. Again, measure in multiple spots to account for any variations.
- Use the smallest measurement to ensure the new door will fit.
Measure the Depth
- Don’t forget to measure the depth of the opening, which is the thickness of the wall. Most exterior walls are about 4-9/16 inches thick, but measure to be sure.
Additional Considerations for Your DIY Front Door Installation
Inspect for damage: Now that the frame is exposed, check for any rot, water damage, or other issues in the studs and surrounding structure. Repair these before proceeding with the new door installation.
Check for level and plumb: Use a level to ensure that the sides of the rough opening are plumb (perfectly vertical) and the top is level. If the opening is uneven, you may need to make adjustments during installation.
Step 2: Install the New Prehung Door & Frame
Prepare the Rough Opening
- Double Check the size: Before you continue your DIY front door installation project, ensure that the rough opening (the space in the wall where the door goes) is the right size for your prehung door. The opening should be slightly larger than the door frame to allow for adjustments.
- Inspect for damage: Check the studs and sill for any signs of rot, water damage, or unevenness. If there are any issues, repair them before proceeding.
- Add flashing or weatherproofing: To prevent water damage, install flashing tape around the edges of the rough opening. This creates a waterproof barrier between the doorframe and the surrounding wall.
Test-Fit the Door
- Position the door: Carefully place the prehung door in the rough opening to ensure it fits properly. Have someone help you lift and hold the door in place, as prehung doors can be heavy.
- Check for level and plumb: Use a level to check if the door is plumb (vertically aligned) and that the sill is level. This is important for ensuring the door swings smoothly and seals properly.
Shim the Door
- What are shims? Shims are thin, wedge-shaped pieces of wood or plastic used to make minor adjustments to the door’s position.
- Place shims behind the hinges: Start by placing shims behind each hinge to adjust the door’s alignment. Insert the shims between the doorframe and the wall studs to create an even fit. Use your level to check that the door is plumb.
- Shim the top and sides: After securing the hinge side, place shims around the top and latch side of the door as needed. The goal is to create a snug, even fit all around the door.
Secure the Door to the Frame
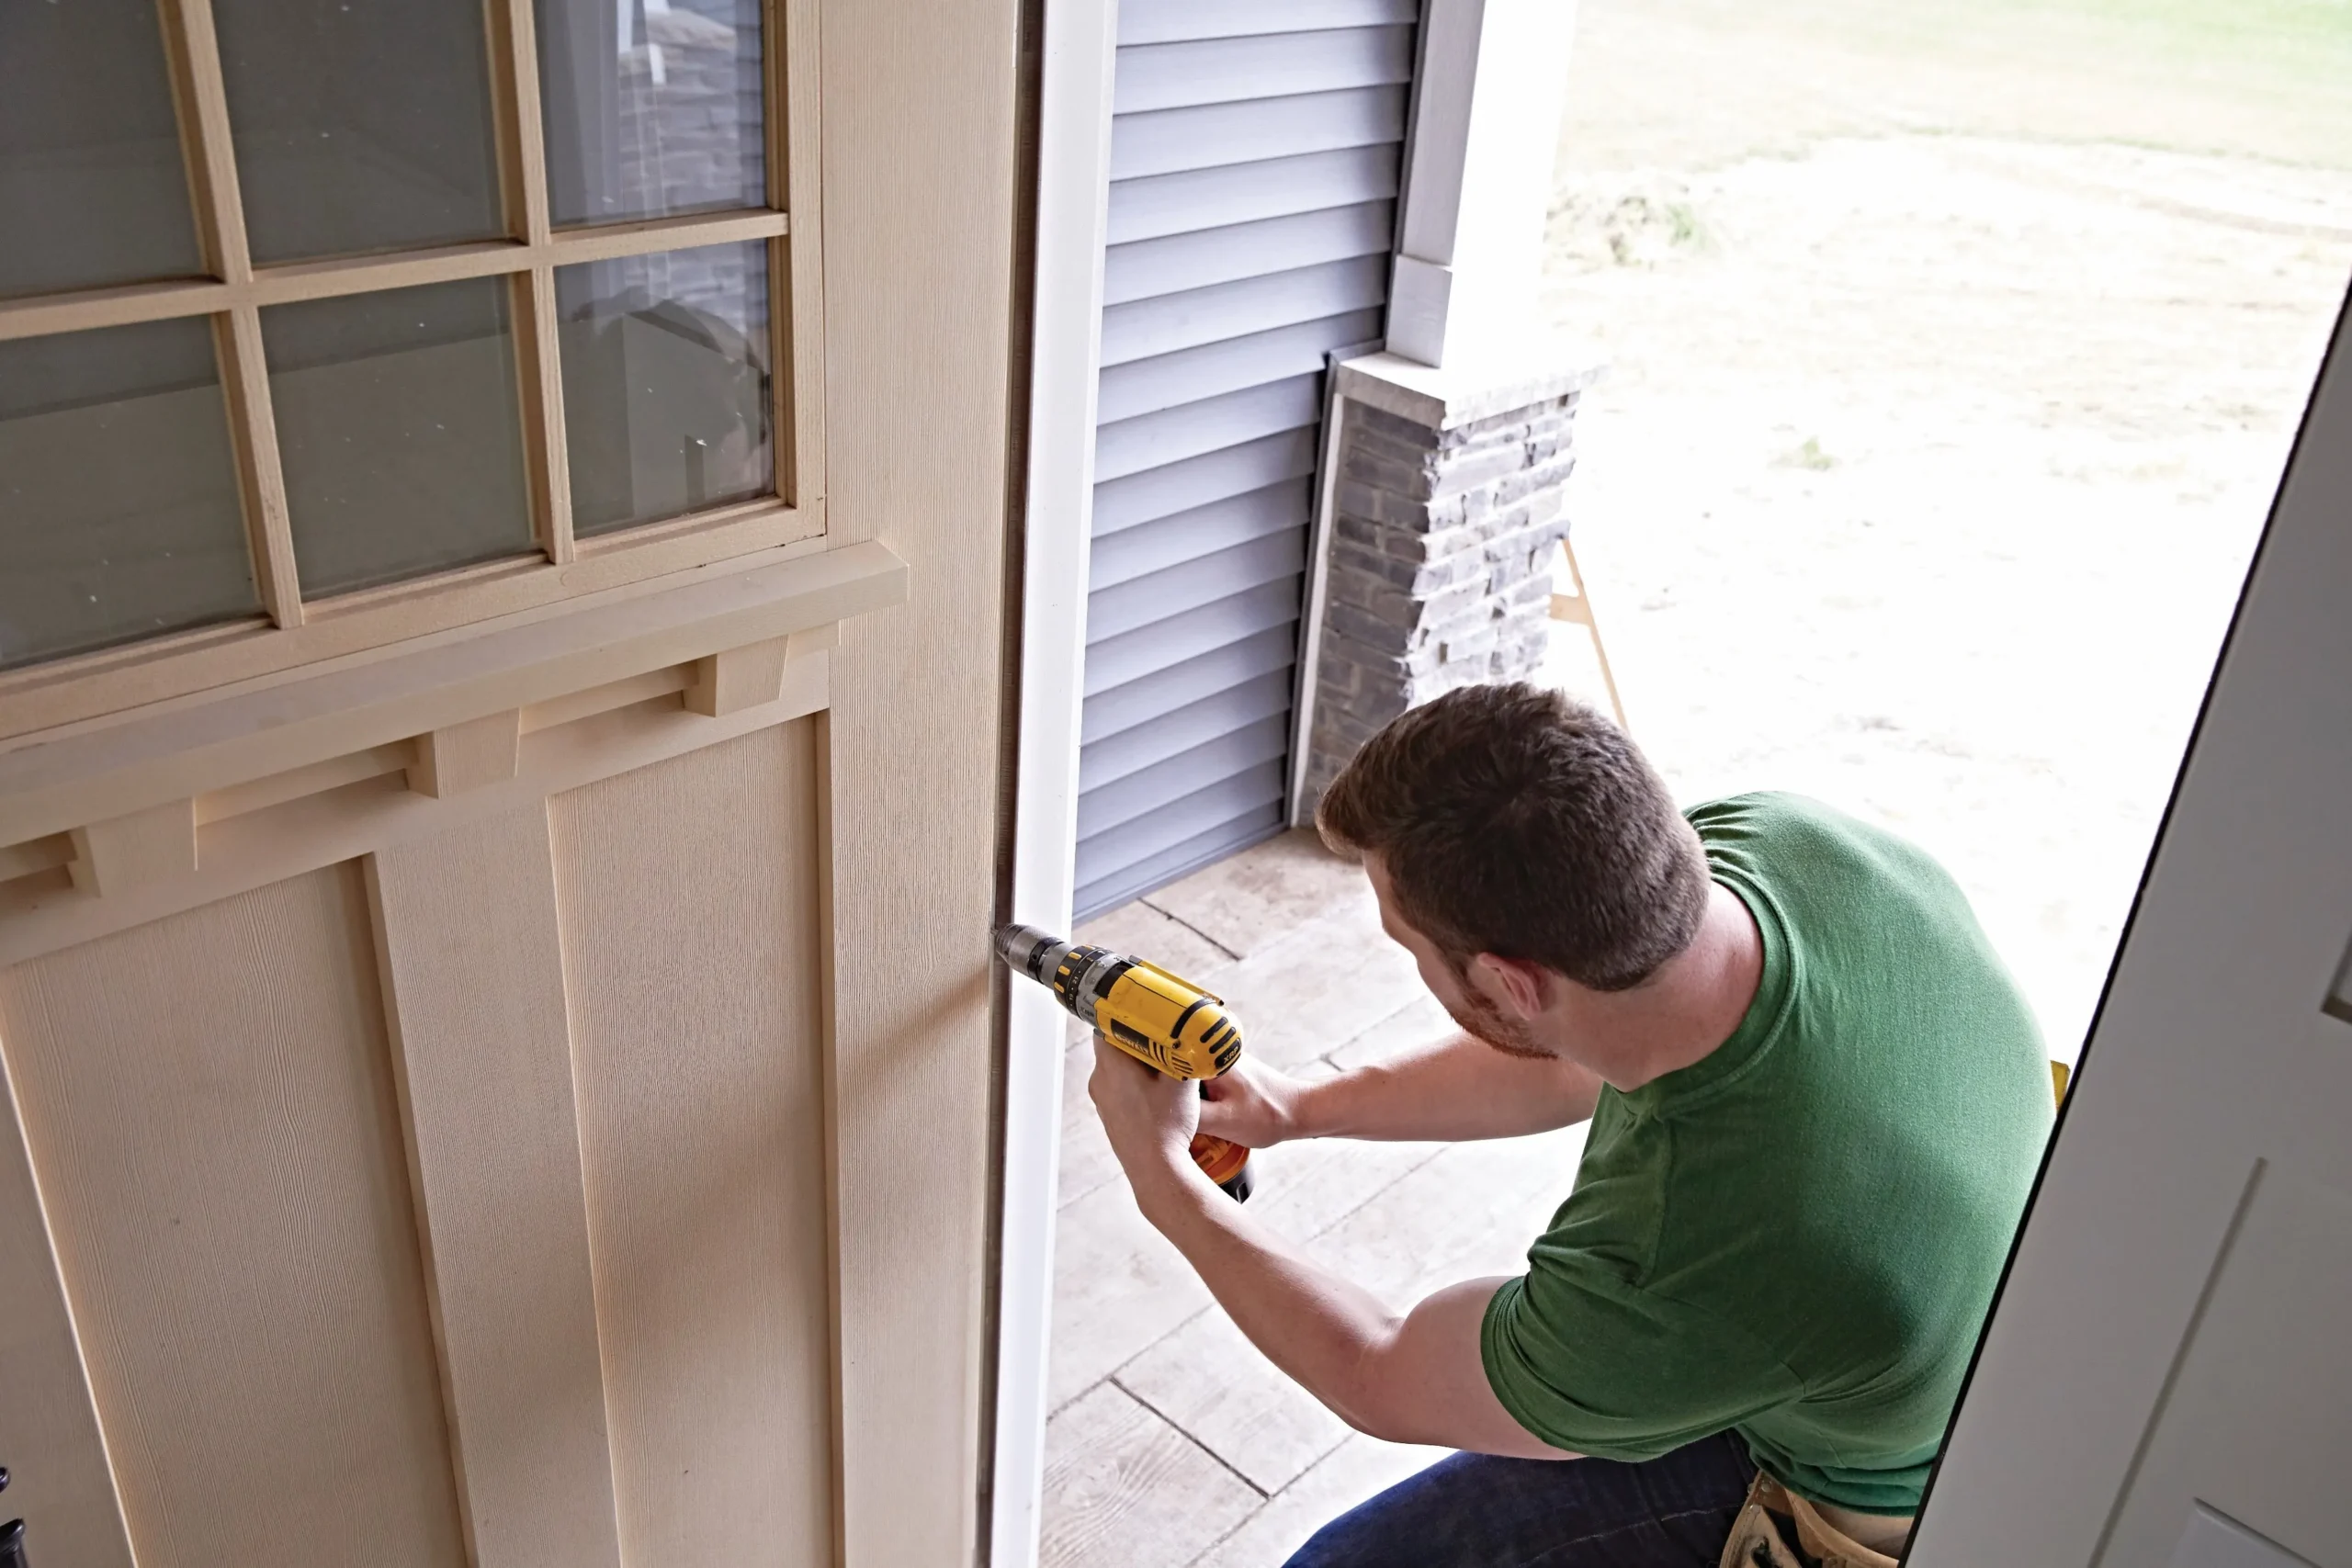
- Drive screws through the shims: Once the door is properly positioned and shimmed, use long screws to secure the door frame to the studs. Start by fastening the hinge side first, driving screws through the shims and into the studs.
- Secure the latch side: After securing the hinge side, fasten the top and latch side of the doorframe in the same way.
- Trim excess shims: Use a utility knife to carefully cut off the excess shim material that sticks out past the frame.
Install the Door Hardware (if the door and frame are prefinished)
- Attach the hinges: If the hinges aren’t already attached, secure them to the door frame with screws.
- Install the lockset and deadbolt: Follow the manufacturer’s instructions to install your door handle, lockset, and deadbolt. These components should align perfectly with the pre-drilled holes in your prehung door.
- Test the door: Once the hardware is installed, test the door to make sure it opens and closes smoothly. If it sticks or doesn’t latch properly, you may need to adjust the shims or hinges.
Seal and Insulate Around the Door
- Apply foam insulation: Use low-expansion spray foam insulation between the door frame and the rough opening. This helps to insulate your home and create an airtight seal. Be careful not to use too much foam, as it can expand and warp the door frame.
- Install weather stripping: Apply weather stripping along the edges of the door to prevent drafts and improve energy efficiency. Most prehung doors come with weather stripping pre-installed, but you may need to add extra or adjust it for a perfect seal.
Attach the Exterior Trim
- Install the exterior molding: If the exterior trim (also known as brickmold) didn’t come pre-attached to your door, now is the time to install it. Use finishing nails to attach the trim around the edges of the door, ensuring that it’s flush against the wall.
- Seal with caulk: Apply exterior-grade caulk along the edges of the trim where it meets the wall. This seals out water and prevents air leaks.
Check the Threshold
- Adjust the threshold: The threshold (the bottom of the door frame) should sit snugly against the floor. Many prehung doors come with adjustable thresholds, allowing you to raise or lower them for a perfect fit. Make sure there are no gaps between the threshold and the floor, which could let in drafts or water.
Final Adjustments for DIY Front Door Installation
Touch up the finish: If you installed a prefinished door and frame, touch up any scratches or scuffs that occurred during installation. Apply a protective finish if needed to shield the door from the elements.
Check for gaps: Once the door is installed, check around the frame for any gaps or misalignments. Use shims to make small adjustments if necessary, and ensure the door swings smoothly and latches properly.
Additional Tips for a Successful DIY Front Door Installation
- Work with a partner if possible: Prehung doors can be heavy, and having a second set of hands can make positioning and leveling the door much easier.
- Take your time with shimming: Shimming is key to a well-aligned door. Don’t rush this step, as proper alignment will prevent issues with sticking, drafts, or gaps.
- Check for plumb and level often: Throughout the installation process, frequently use a level to ensure that everything is aligned correctly.
Step 3: Painting or Staining Your New Opening
Once you’ve installed your new prehung front door, the final step with your DIY front door installation project is to give it a beautiful finish by painting or staining it. Not only does this enhance the door’s appearance, but it also helps protect it from the elements. Whether you choose paint or stain depends on the material of your door and the look you’re going for. Here’s how to do it right.
Painting a Prehung Front Door
If you have a fiberglass, steel, or wood door and want a bold, solid color, painting is the way to go. It’s also a great option for doors with a lot of exposure to the elements, as paint creates a protective barrier.
Choose the Right Paint and Supplies for Your DIY Front Door Installation
- Paint type: Use exterior-grade paint. For wood doors, both oil-based and latex paints work well, though latex is easier to clean up. For metal or fiberglass doors, use paint specifically designed for those materials.
- Finish: A semi-gloss or gloss finish is best for front doors. These finishes are durable and easy to clean, making them ideal for high-traffic areas like entrances.
- Brushes and rollers: Use high-quality brushes or foam rollers to apply the paint smoothly. A small angled brush is helpful for detailed areas like panels and trim.
Prepare the Door
- Remove the hardware: Take off the door handles, locks, and any other hardware before you start. This will make the painting process easier and give a cleaner result.
- Clean the surface: Dirt, grease, and dust can prevent paint from adhering properly. Use a damp cloth with mild soap to clean the door, then let it dry thoroughly.
- Sand the surface: If required per the door manufacturer’s instructions, lightly sand the door to create a smooth surface for the paint to stick to. If the door has a glossy finish, sanding will help the new paint adhere better. After sanding, wipe the door clean to remove any dust.
- Prime the door: If you’re painting a bare wood door, or if you’re drastically changing the color, apply a coat of exterior primer. This helps the paint adhere better and provides a more uniform finish. Use a primer suited to your door’s material—there are special primers for metal and fiberglass doors as well.
Apply the Paint
- First coat: Start with a thin coat of paint. Use long, smooth strokes with your brush or roller. If your door has panels, paint the edges of the panels first, then move to the larger flat areas.
- Let it dry: Allow the first coat to dry completely before adding another layer. Follow the paint manufacturer’s instructions for drying times.
- Second coat: Apply a second, even coat of paint to give the door a solid, even color. You may need a third coat depending on the color change or the door material.
- Check for drips: Watch for drips and runs, especially around panel edges. Smooth them out before they dry to avoid an uneven finish.
Let the Door Cure
Drying vs. curing: While the paint may feel dry to the touch in a few hours, it takes several days to fully cure (harden). Avoid reinstalling the hardware or using the door heavily until the paint has fully cured.
Staining a Prehung Front Door
If you have a wooden door and want to showcase its natural grain, staining is a great option. Staining enhances the beauty of wood and gives it a rich, natural look. It’s especially popular for homes with rustic or traditional aesthetics.
Choose the Right Stain and Supplies
- Stain type: Use an exterior-grade wood stain. There are oil-based and water-based stains, with oil-based offering a deeper, richer finish but taking longer to dry.
- Brushes or rags: For staining, you can use a natural-bristle brush, foam brush, or a clean cloth, depending on the look you want to achieve.
- Clear sealer: To protect the stained door, you’ll need to apply a clear, exterior-grade sealant or varnish once the stain has dried.
Prepare the Door
- Remove the hardware: As with painting, remove any handles, locks, or other hardware to make staining easier.
- Clean the door: Ensure the door is clean and free of dust, grease, or dirt. Use a damp cloth and let it dry thoroughly.
- Sand the door: Sand the door lightly, focusing on any rough patches or areas with uneven grain. This opens the pores of the wood and allows the stain to penetrate more evenly.
- Use wood conditioner (optional): For softwoods like pine, using a wood conditioner before staining can help the wood absorb the stain more evenly and prevent blotches.
Apply the Stain
- First coat: Apply the stain with a brush or cloth, following the direction of the wood grain. Work in small sections to avoid letting the stain dry before you can blend it in.
- Wipe off excess: After applying the stain, use a clean cloth to wipe off any excess stain, again following the grain of the wood. The longer you leave the stain on before wiping, the darker the finish will be.
- Let it dry: Allow the first coat of stain to dry according to the manufacturer’s instructions, usually a few hours.
Apply Additional Coats (If Needed)
- Second coat: If you want a deeper color, apply a second coat of stain after the first one has dried. Be sure to wipe off any excess between coats.
- Test the color: Always test the stain on a small, hidden area of the door to ensure it’s the right color before applying it to the whole door.
Seal the Door
- Apply a clear coat: Once the stain has dried completely, apply a clear exterior sealer or varnish to protect the door from moisture and UV damage. This is especially important for doors exposed to direct sunlight or heavy weather.
- Multiple coats of sealer: For the best protection, apply at least two coats of clear sealer, allowing each coat to dry thoroughly before applying the next.
Finishing Touches for Your DIY Front Door Installation
Install the Hardware
Once the paint or stain has fully dried, install the door hardware, including the handle, lockset, and any other accessories. Make sure everything is properly aligned and secure.
Touch-Up as Needed
If you notice any spots that need additional coverage or touch-ups after the door is reinstalled, go ahead and carefully apply more paint or stain. Be sure to use the same method and materials for consistency.
Additional Tips for Success
- Work in a dust-free environment: Dust and debris can ruin a smooth finish. If possible, paint or stain the door in a clean, dry area.
- Use drop cloths: Protect the floor and surrounding area with drop cloths or plastic sheeting to catch any drips or spills.
- Be patient: Take your time between coats, especially when staining, to allow each layer to dry thoroughly for the best result.
Conclusion: Mastering Your DIY Front Door Installation
Undertaking a DIY front door installation is a rewarding project that not only boosts your home’s curb appeal but also enhances security, energy efficiency, and comfort. While the process may seem daunting at first, with careful planning, the right tools, and a step-by-step approach, you can successfully replace your front door and enjoy the results for years to come. Whether you’re removing an old door, measuring the rough opening, or carefully installing a new prehung door, each phase of the DIY front door installation process plays a critical role in ensuring a perfect fit and lasting durability.
One of the biggest advantages of taking on a DIY front door installation is the cost savings. By doing the work yourself, you can save money on labor costs, allowing you to invest in higher-quality materials or upgrade your door’s features, such as adding better insulation or opting for a more durable door. It also gives you complete control over the design and function of your door, ensuring that the final product reflects your personal style and meets your home’s needs.
Of course, like any home improvement project, there are challenges to a DIY front door installation. From removing the old door and frame to ensuring your new door is level, plumb, and properly insulated, each step requires attention to detail. However, by preparing thoroughly—taking accurate measurements, following manufacturer instructions, and double-checking for alignment—you can avoid common pitfalls that lead to drafty doors or gaps that compromise security.
Beyond the technical aspects, your choice of finishing the door, whether painting or staining, adds a personal touch and acts as the final protective layer. A well-painted or stained door not only elevates the aesthetics of your entryway but also protects the material from weathering, moisture, and sunlight. This crucial step of your DIY front door installation adds value to the door and keeps it looking new for years, all while boosting your home’s curb appeal.
By understanding each phase of DIY front door installation and taking the time to do it correctly, you gain a sense of accomplishment knowing that you’ve improved the functionality and beauty of your home. More importantly, a well-installed door can offer peace of mind, knowing that it’s secure, energy-efficient, and a welcoming focal point for visitors.
For homeowners seeking to enhance their DIY skills, a DYI front door installation is a fantastic project that balances practical benefits with a sense of pride in the finished product. The time and effort spent on the installation will pay off in the form of improved home security, comfort, and style, making it a project worth pursuing for any motivated DIY enthusiast.
